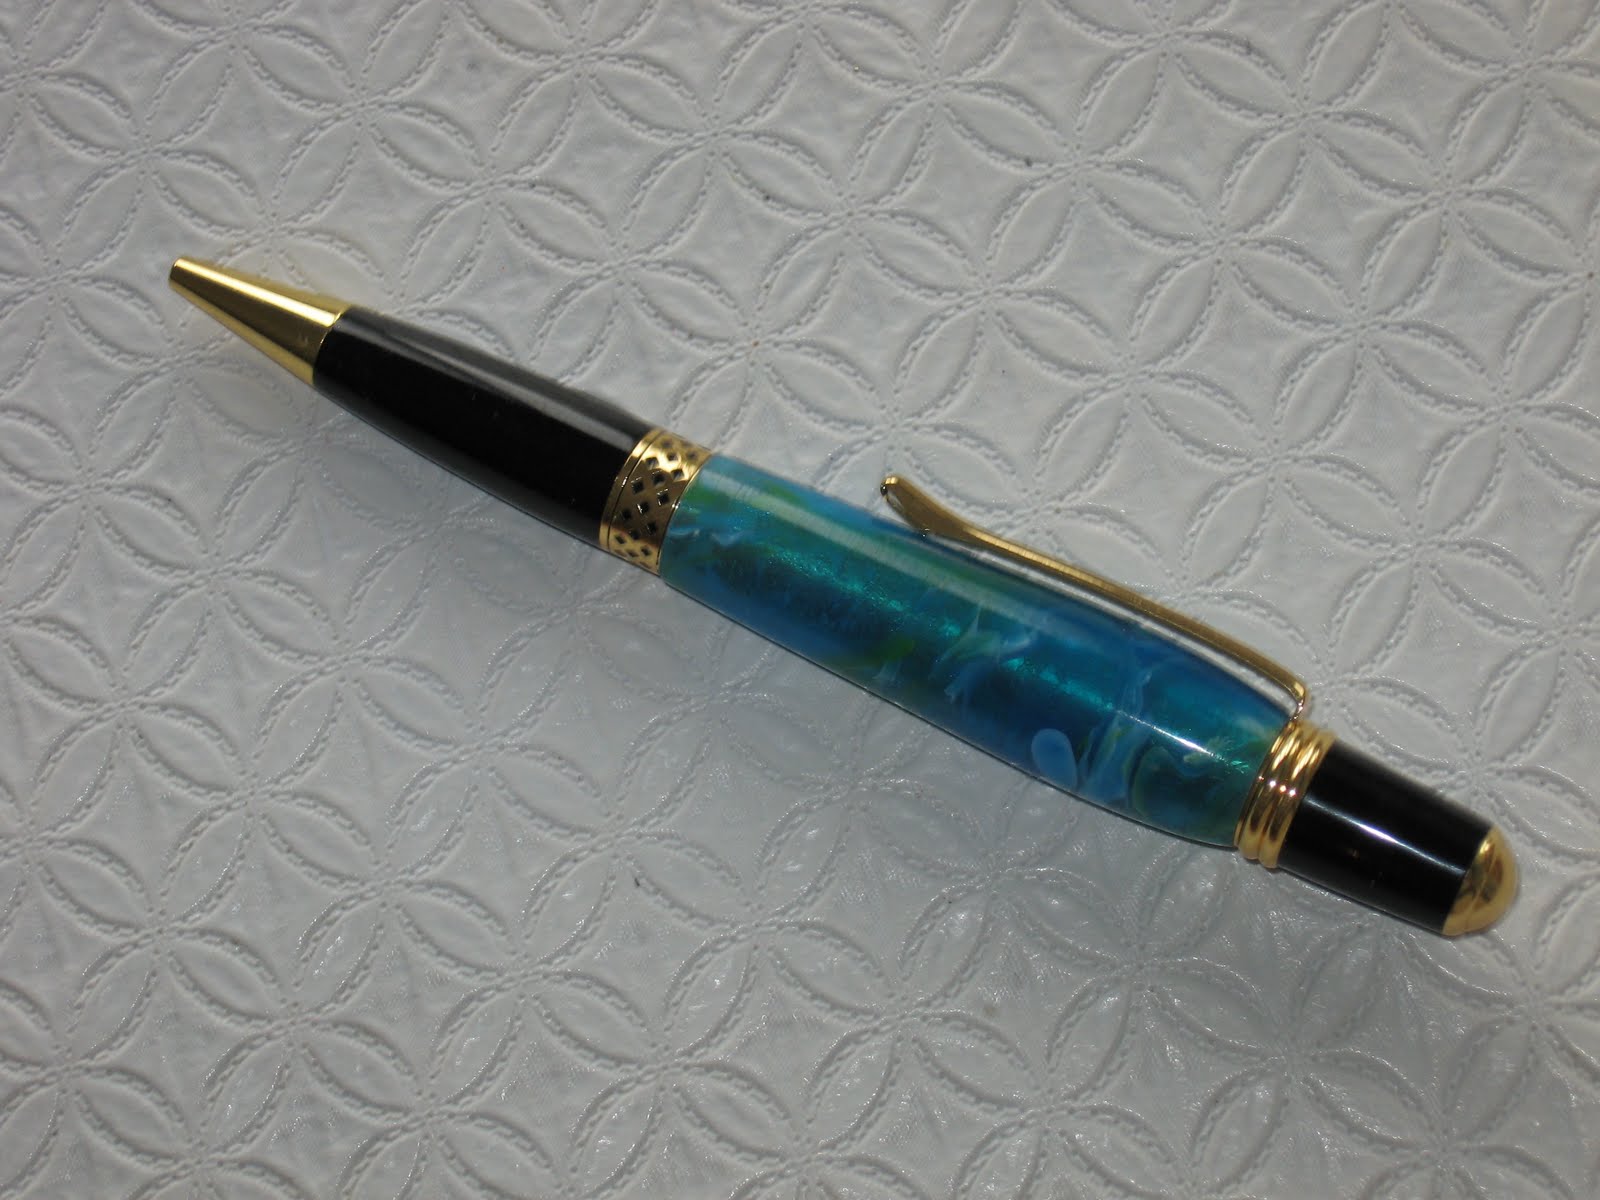
Hello everyone. Here is another pen made from an acrylic blank and a mesa pen kit. The blank is approximately 5 inches long 3/4 x 3/4. If cut in half, two pens can be made with this (ocean mist) blank. Using sharp lathe chisels a process after drilling and trimminng the blank, taking very small cuts is the secret to making a very smooth finish. Once the blank is ready for the finishing segment I wet the surface with water on a cloth, (with the lathe running) and starting with 600 grit sandpaper, then wiping it clean with a soft cloth, and doing the same process with 1500, 2400, 4000, 8000, and finally 12,000 grit. I then use a finishing polishing called Mylands 3 step polishing system. This pen comes out a flawless beautiful pen, which uses a standard parker refill.
Monday, August 23, 2010
Wednesday, June 16, 2010
Here is my latest project of a laser inlay kit, made of black dyed spalted maple, cocobolo, and natural curly maple. The kit comes with 5 pieces (tube,4 pieces of wood) and assembly instructions. Since the laser has cut the openings for the rifle stock, barrel and the scope, it is required to insert the tube into the main body (curly maple) then pressing the the fitted pieces into there position. Then removing the tube form the body, and using CA thin glue (which dries almost immediately) onto the inserted parts and let dry.
Next try inserting the tube, however it may have been that some of the glue leaked through to the inner portion of the body. In that case taking a small dowel or pencil and wrapping a piece of 220 grit sand paper to smooth the inside until the tube can easily be placed in the body. Using a two part epoxy glue, coat the tube with the mix, be sure the tube is centered in the body, and let it dry over night. Sand both ends so that the tube and the body ends are flush. Turning this asssembly is critical and make sure the turning tools are sharp. Place on the lathe, I like to use 220 grit sand paper first to take the rough edges off the rifle parts if there are any slight protrusion. Then using the same procedure of finishing as in the previous posts, with 320, 400, 600,1200, 1500 grit, turners polish, and then the assembly is being done with a Mesa pen kit.
Friday, June 11, 2010
Saturday, March 6, 2010
This click pen is made of Bethlehem olivewood that comes from
Israel. With each blank I receive is acompanyed with a " Certificate of Authenticity". The certificate states that the trees have been bearing fruits in the Nativity town of Bethlehem since the time of Jesus. It also states that it is an authentic Bethlehem Holy Land olive wood. The raw material that was produced from the pruning of the olive trees, the sprouts from the old and the unproductive trees which is an essential process for a heathier growth for the trees and to generate environmental stability.
No trees were damaged or destroyed in the process of harvesting this olive wood.
Saturday, February 27, 2010
Bullet pens
Tools for turninng
This is a jig I made from two pieces of hard wood, a 2" x 2" x 2" ash with a 90 degree slot cut as indicated, and a piece of 3/4 in x 4" x 6" as the base, then screwed together as shown. This is to hold the blank in an upright position for drilling and also trimming with a milling tool. I also drilled a 1/2 inch hole in the base (as shown) to allow for the drill bit to pass throw while drilling the blank.
Then the blank is cut (allowing an eight of an inch on each end of the blank to allow for trimming) and its ready for the drilling procedure. Clamped the blank onto the jig to be drilled on a drillpress. Its ready to glue in the tube now which came with the pen kit. I usually let the glue dry overnight since I use gorrilla glue, which dries slower. Then do the trimming and its ready for turning.
Thursday, February 18, 2010
Tuesday, February 16, 2010
Monday, February 15, 2010
This pen is from pieces of 3/4 x 3/4 maple and african blackwood cut to the size of the tubes for both the top and bottom of the pen. The pieces are drilled on a drill press lengthwise using the correct size of drill bit according to the particular pen kit you are making. I made a jig from two pieces of hardwood to place them on the drillpress and clamp it into the jig to drill straight thru to accept the tube to be glued in once pieces are all cut. After the drilling, using a miter saw setting it at 30 degrees, cut the different wood to the size you desire to fit onto the tubes. Then I glue the pieces unto the tubes using gorrilla glue, or any other type of ca glue, making sure that I leave at lest 1/8 inch of wood over the edge of the tubes to allow for trimming the ends with a milling tool in the drillpress. Mill the ends in the same jig and clamp, and your ready to do the turning. I follow the instructions that are sent with the penkit for turning and assembly making sure I have the right bushing set that is requried for each different type of pen. When the turning is complete, its time to do the finishing while its still on the lathe. I use group of grit sand papers starting with 220,320,400,600,1200,1500. After I get the finish I desire, I use turner's polish applying 2 or 3 coats, then about 4 or 5 coats of bees wax, that should do it. Now its time to assembly, so just follow the instructions that come with the penkit
Sunday, February 7, 2010
power pen kit
Subscribe to:
Posts (Atom)